

Meeting or teaching one-to-one
Do you have lots of one-to-one meetings? Or teach one-to-one? The following are steps to get you started.
You may be considering creating Teams for each of your one-to-one meetings or lessons, but that can get cluttered over time. Teams are really meant for groups of three or more people.
So what would work better? Using Chat in Teams.
• You can start a video meeting from a chat.
• Access files shared with each other in Teams.
• Pin chats and order pinned chats.
When you are ready for your first virtual meeting with a new person.
In the Chat area of Teams click the New chat button.
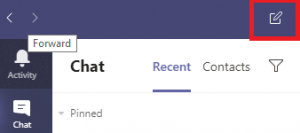
New chat button
A window will open with ‘To: Enter name, email group or tag’
Type the name of the staff member or student, that you will be having the one-to-one with. Teams is linked to the RCS email address book and a list of names will appear as you type, select the correct person from this list.
A message appears ‘You’re starting a new conversation’ and you can type a message to them in the ‘Type a new message’ box or start a meeting right from your chat. In the chat area, look in the upper right corner for the Video call and Audio call buttons.
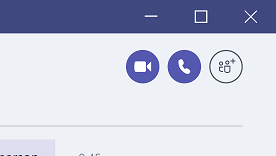
Video call, audio call and add person buttons
Once you’re in a call, either of you can share your screen so you can look at things together—like files or websites. See further down this page for how to share files in a chat.
If this will be a regular chat meeting, pin that chat.
Pinned chats stay at the top of the chat area so you don’t have to hunt for them. Pin the chat for each person you meet with, one to one. You can pin up to 15 chats.

Chat menu showing Pin
To pin a chat, highlight the chat, then select ![]() More options, Pin.
More options, Pin.
Once you’ve pinned the chats, drag them into the order you want, by name or by day of the week you meet. Now all your important chats are within easy reach.
Next, put important stuff in tabs at the top of your chats.
Maybe you’ve got a file that you review regularly together during your one-on-one time. To keep it readily available, turn it into a tab that’s part of your chat. To do this, after you’ve shared the file in the chat, click Add a tab (the + sign) at the top of the chat. Choose the type of file it is, then the file itself.
You can use a OneNote tab for things like agenda and meeting notes or shared lesson plan, aims and objectives. Tabs can also be links to other things—like a whiteboard, or a website. Get to a frequently used file by making it a tab.
Tip: Remove a tab when it becomes no longer relevant, to keep things tidy.
A little bit more about files in Chats
Your chat with a person catalogues the files that you and that person share with each other in Teams—all right there on the Files tab.
Here are two ways to share files in chats:
• Go to Files on the left side of Teams, highlight the file, and choose ![]() More options, Copy link, and paste the link directly into a message.
More options, Copy link, and paste the link directly into a message.
• In the toolbar under your message, click ![]() Attach, and upload your document.
Attach, and upload your document.